Sunday 7-8-2016. QMC4. Willowbank Raceway. Fine, warm, light winds. Test 1 was Eccentric, and when completing the second loop, the right angle gearbox destroyed itself. Took it home and removed gearbox. Could not remove input shaft, so photographed gears in place.
Got out designs of larger right angle drive gearbox to see if larger gears can be fitted. TEA Transmissions cannot supply larger gears because they all have 27 mm dia bores, not 20.
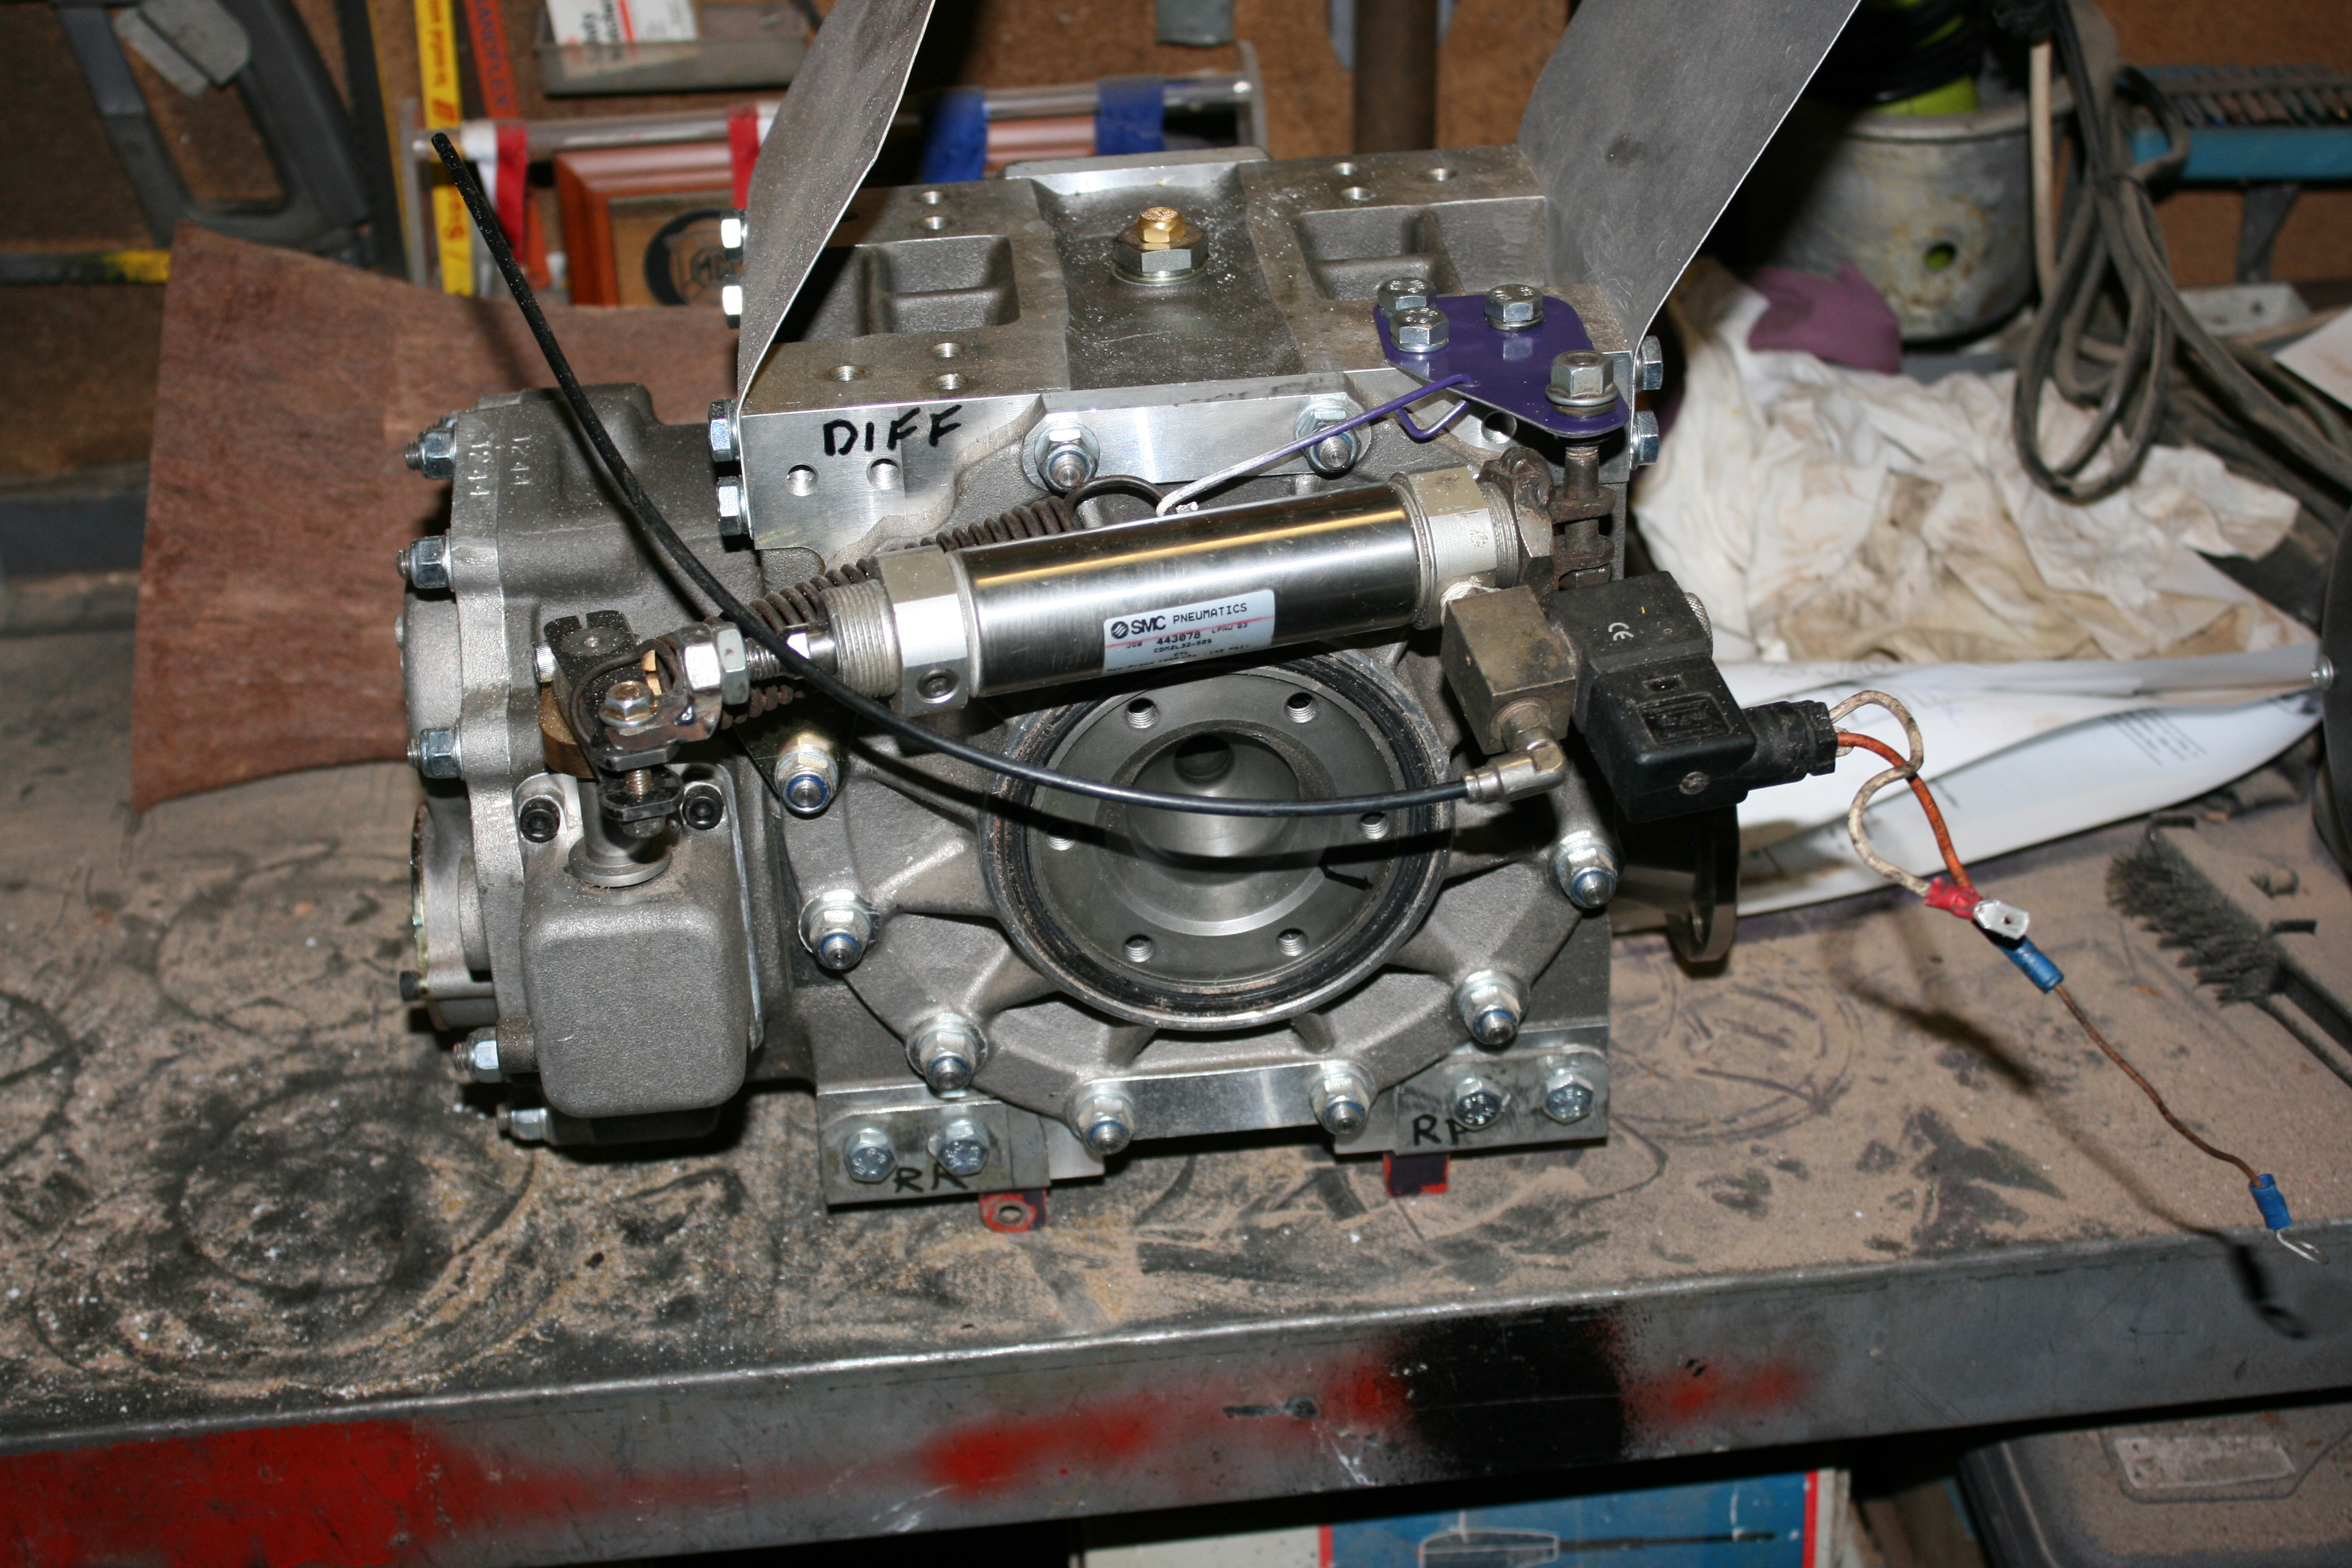
Tuesday 9-8-2016. Contacted Elite Racing Transmissions in England regarding their MX-200 reversing differential, and advised it has a 2 to 4 weeks manufacturing time. Checked the dimensions of the unit and it will fit in OK.
So on Sunday 14-8-2016 all the existing VW Golf gearbox and related stuff was removed from the car, and new mounting plated made for differential. It was ordered from England. Confirmation of the order arrived on Tuesday 16th August, but there were problems between banks transferring the money. Approval and transfer finally accomplished on Monday 29th. Meanwhile I made a complete mock up differential from wood so I could organise ancillaries around it. Repositioned fuel pump, catch tank, fuel tank, air reservoir etc. I found a problem with the throttle cable sticking, and modified mounts to fix it.
Thursday 1-9-2016. Cut VW Golf hollow driveshafts to suit, and cut 30 dia shaft to fit into them. Welded up new halfshafts. On Thursday 11th October, Kelly from Elite emailed to say that the CWP was being finished, and the unit would be dispatched this week. Nine days later, on 20-10-2016 Kelly from Elite emailed to say there was a problem with the CWP, and the diff would be finished tomorrow. Advised on 7-11-2016 that it was finally being dispatched. I then tracked it from England through Germany to Sydney where it arrived on Thursday 17th. On Wednesday 23rd it is still in Sydney, and found out it is awaiting a further $608.89 in customs duty before it will be shifted into the mailing system. It finally arrived on Thursday 24th. When I tested it I found it was stuck in reverse, and the ratio was 6:1 for reverse. I was able with lots of trouble to get it into forward gear, and found the ratio was 4:1 like I asked for.
Friday 25th I made the final mounts for the diff and installed it in position. I added oil to the unit after finally finding out where the oil level indicator was, and oil leaked out of the flange mounting holes. Frantic emails back and forth, to find out that when the CV joints are bolted onto the flanges, they will seal over the holes.
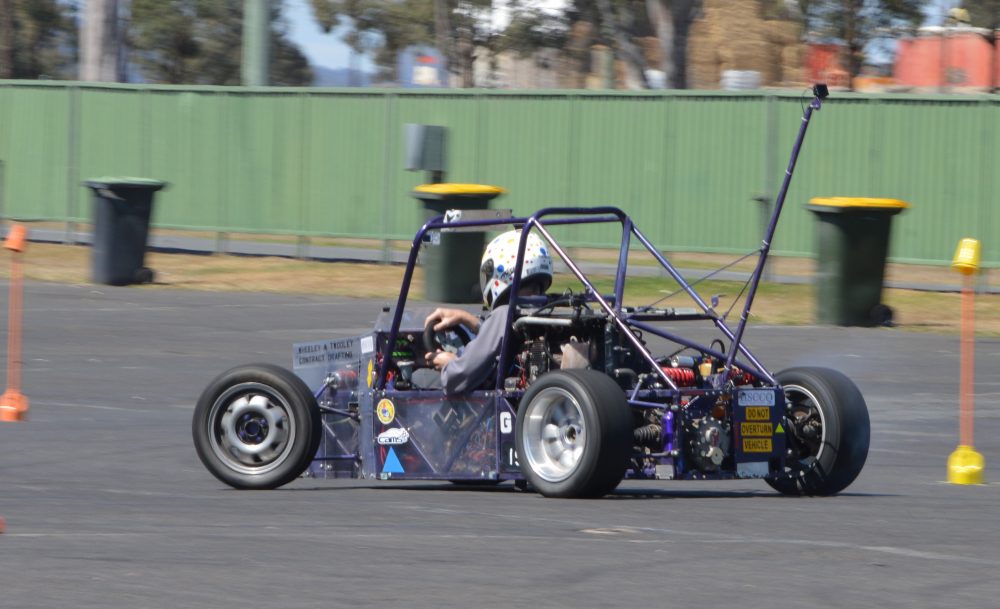
2017, and I tried to run the motor, but had to stop because of a massive fuel leak. Fixed it and then started the motor with the diff in forward and first gear, and the rear wheels rotated forward. Put it into reverse, and the rear wheels went backward. Success. Next day I lowered it onto its wheels, and did the corner weights. Made left/right threaded pushrods and installed them. Bought two new bathroom scales, and redid corner weights. Fronts set at 66kg left, 64 kg right; with rears 122 left and 101 right. Total weight 333 kg.
Private testing at Willowbank on Wednesday 18th January, and found it revs really well, and accelerated very strongly in the rev range. Turning brakes do not work well at low speed, but work at higher speeds. The clutch is dragging, and will not release properly.
On Sunday 29th there was evidence of oil leaking out of the oil level plug in sump, so took it off, cleaned up the hole, and filled it with alloy epoxy. Next day I refitted it, filled it with oil, and there are no leaks. A new battery was bought and fitted on 9th March.
On Sunday 12th March I took it to the HSCCQ Come and Try Motorkhana at Willowbank. The rear ride height was too low, so I wound it up as far as possible. Clutch is still dragging, and throttle is still sticky. Difficult to drive. But the power off the line is impressive, wheel spinning all the way to the first pole of the test. Found oil leaking from alternator cover, so retired the car.
Next day I solved the throttle cable sticking by straightening out the bend in the cable sheath, and rerouting the cable over the front suspension units to a modified mounting on the pedal. Took the alternator cover off, cleaned out the old silicon sealant, and wire brushed the area. Filled crack with alloy epoxy. Refilled with oil, and no leaks.
The first two rounds of the Queensland Motorkhana Championships were at Gladstone on 25th and 26th March, and found that bolts on the rear suspension pushrods had fallen out during the journey. Fitted new ones, and found that the clutch would work only once after being bled, and then dragged badly, and the throttle went back to sticking after the first test. Very difficult to drive, but VERY fast when it was going. Next day as I was changing the wheels before scrutineering I found the left front wheel seemed loose. After investigation, I found that the stub axle had cracked completely around a 20 mm diameter circle, and the wheel was only being held on by the brake calliper. Packed it back up, and came home early.
The sticking throttle is caused by the ferrule sliding along the inner sheath and jamming. Epoxy alloyed to hold it in place, and seems to have solved the problem. Steering column bolts have developed some slop, causing some freeplay in the steering. New bolts solved that problem. Made an extension for the gear lever on differential, and fitted it with a repositioned spring. Still needs a strong bang to get it out of reversed and into forward. Cut top corners off clutch pedal to stop it hitting front bulkhead. Started taking front hubs apart to replace stub axles with stronger ones. These have 10 mm thick flanges instead of 5 thick, and are made from 4140 material. Bought a new clutch master cylinder from a Corolla AE71, but the fittings do not fit the existing hoses. Got a specially made hose made by Brakes Direct at Hendra for only $37. Wonderful service by them. Sunday 9th April, and I fitted the new stub axles into the front hubs, and welded them in place. A week later my injured hand was OK and I fitted the heat insulation to the back of the firewall.
On Sunday 21st May I took it to the HSCCQ Khanacross, where the clutch is still dragging. I bled it many times, but it still would not release properly. Terry noticed that the alloy pedal is distorting under load and hitting the front bulkhead, so I brought it home and made a new steel clutch pedal.
On Sunday 28th I did the design of using a double acting air cylinder for the forward / reverse, and ordered the parts. Fitted them on Wednesday 31st, but wired it up incorrectly, and burned one of the wires out. Rewired it with heavier wire. Tested it and it works perfectly on 60 psi.
Sunday 18th June was QMC3 at Willowbank, and the clutch will not drive the car. Do not know what is wrong, so took it home and tested the slave cylinder. All works OK, so on Friday 30th took the clutch plates out to measure their thickness. All is correct, so contacted Noel to get his advice. When he looked at the clutch plates under a strong light, it became obvious that they had been very hot and had blued, baking the oil into the surface. Also it was found I was using car oil and not motorcycle oil, so I degreased all the clutch and fibre plates, and took the glazing off with emery paper. When re-assembled the clutch seems to be working properly, but without the oil filled up.
Sunday 2-7-2017. Bought oil and filter, fitted them, and started it up in neutral. A week later I tested the clutch and it worked OK.
It went to the HSCCQ Khanacross on 9-7-2017, and the clutch worked once, but would not the drive the car. So I measured the stroke of the original FJR clutch cylinder. 14 diameter x 18 stroke = 2,770 cu. Mm. Slave cylinder 33.6 diameter x 3.12 mm stroke = 2,770 cu. Mm. Clutch spring length is 6.78 mm with a minimum of 6.44 tolerance, so it will not go over centre with the stock master cylinder. The Corolla master cylinder is 15.875 diameter with 35 stroke = 6,927 cu. Mm. which is 7.81 mm on the clutch spring; meaning that it can go over centre. S I got my mate to watch what went on in the disassembled clutch while I operated the pedal, and then swapped so I could see. We then realised that the clutch was going overcentre, so I drilled a hole in the pedal, fitted an adjustable stop, and adjusted it to not allow enough travel to go over centre.
Sunday 6-8-2017. QMC 4 at Willowbank. Clutch is very severe, engaging quickly at first lift of the pedal. RH turning brake not working properly, and both master cylinders leaking. Car seems sluggish overall, and brakes seem to be dragging, car stops almost immediately when clutch is depressed. It went into reverse perfectly, but would not then go back into forward. So I extended the lever, and repositioned the cylinder. I put a spring on the brake pedal to try to solve the sluggishness. I made a forward / reverse gear lever for the cockpit, and fitted it on 17-8-2017.
At the HSCCQ Motorkhana on 10-9-2017 the right hand side turning brake was not working, and I found it had split the line right at the fitting on the calliper. I tested it after fixing the hose, and overheated the motor. I took the radiator off, and hosed about 1/3 cup of crap out of it, and now it flows water well. Started it up, and no leaks, but the throttle only works ¼ travel. So I took off the top of the pedal, and modified it to get full throttle.
Saturday 23-9-2017 was the HSCCQ dirt khanacross, and I ran it with the 14” wheels and rally tyres. The rear suspension collapsed from the rough ground, and it ground to a halt only metres from the finish garage.
I made new suspension mounting brackets for the rear, and tightened the mounting bolts on the diff.
Sunday 15-10-2017 was the HSCCQ Khanacross, in pouring rain. The rain got into the electrics, and it would not start properly, even with the jumper battery fitted.
My new Avon slicks arrived on 18-10-2017, and I weighed them on the rims. Fronts on ATS wheels are 9 kg, tyre weighs 4.1 kg. Rears on 7” wheels are 10.8 kg, tyre weighs 4.5 kg. both are 505 diameter.
Sunday 12-11-2017 was the Interclub Khanacross, and when I went to start the car there were sparks from the cigarette lighter socket. So I disconnected the wire from the back of it, and when I went to disconnect it at the isolator switch, the terminal was extremely hot. I found that the terminal from the regulator had been rubbing on the firewall, and worn out the insulation, giving a direct short. I disconnected the battery, and bent the terminal out of the way, and it started perfectly on the normal battery. I ran the first test, and it wheelspun to redline on the way to the first gate, but the brakes were very spongey. I did not run in the second test because all the mountings for the differential failed, and it was sitting at a crazy angle. I took it all apart, and made stronger mountings for the diff. I took the cigarette lighter out of its panel and mounted it in the dashboard. I took the battery off, and mounted it in the cockpit, and mounted the isolator switch on the underside of the dashboard. I wired it all up, but the car would not crank over properly. I was now running all the power through the 50 amp fuse instead of to the dashboard, and it had blown. I bought a 40 amp fuse holder and fuses, and mounted it behind the dash, and it starts perfectly. I made an insulated connector panel for the three wires where the isolator used to be.
A spare ECU arrived from Tasmania (cost $35), and it tested OK, and is now my spare.
On Saturday 9-12-2017 I tested the car at Materials Handling, and the brakes still are not up to scratch. The motor tended to break down at very high revs. It powers out of tight turns extremely well, and is fun to drive on the rain tyres. The front wheel guides on the trailer work well. Next day I took the rocking brake balance bar apart and made it into a simpler non-rocking version.
A couple of days later a new heavier wire was installed parallel to the one running from the isolator to the connector at the starter solenoid, and the extra current makes starting easier.
On Saturday 16-12-2017 I made some ¼ turn WZUS fasteners for the Lexan, and they worked really well. Next day I made 6 more. During the next couple of days all the remaining screws were replaced with WZUS fasteners.
In December 2017 I remade the wheel guides on the trailer to lower them down to the tops of the suspension members. I then removed the old lifting frames from inside the trailer because I have not used them for years. Then I water blasted all the crud off the trailer, and painted it mission brown killrust.